How to share a Virtual Tour or video on your Rightmove Listing
If you’re looking for help to upload your Virtual Tours and videos to your listings on Rightmove here’s a quick step by step guide to how to do that.
If you usually upload your listings to Rightmove using an automatic data feed
Continue to upload Virtual Tours and videos to your properties using your data feed – you won’t be able to upload Virtual Tours and videos within Rightmove Plus. The only feature that you will use in Rightmove Plus will be the “Online Viewing” tick box, found when you edit a property from the Property List. Simply go to the “Online Viewing” tab and tick the box, then Save and Make Live.
All other changes, including uploading Virtual Tours and videos will still need to be done using your automated data feed from your software.
If you usually upload your listings to Rightmove using Rightmove Plus
Follow the steps below to upload your Virtual Tours and videos to your listings.
> First log into Rightmove Plus
To make changes to your property listings and add content like Virtual Tours and videos you’ll need to log into Rightmove Plus. You can do this by clicking on the Rightmove Plus link in the footer of the Rightmove homepage or by following this link.
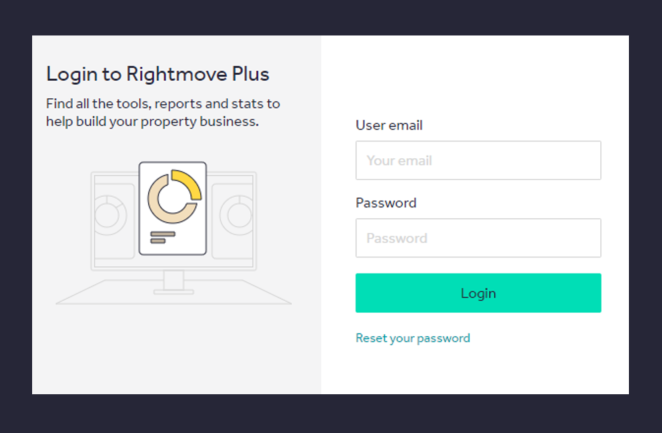
You’ll need to enter your email address and password, don’t worry if you’ve forgotten your password you can always reset it.
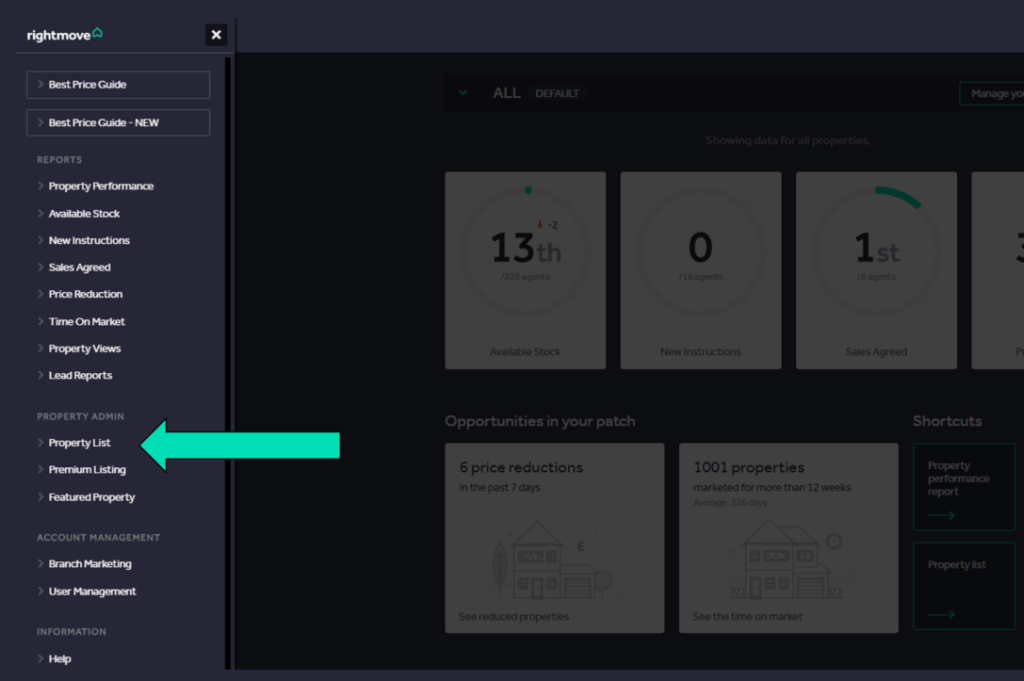
> Go to Property Admin
Once you’re logged in, you’ll see your Rightmove Plus dashboard and on the left of the screen will be the menu icon. Click on that and select Property List from the options.
> Editing a property
Choose the property you wish to add your Virtual Tour or video to by clicking on the image of the property or the first line of the address, which is highlighted in bold.
From there you can amend the Basic Information of the property, such as the address and price, but you’ll need to click on the Media tab.
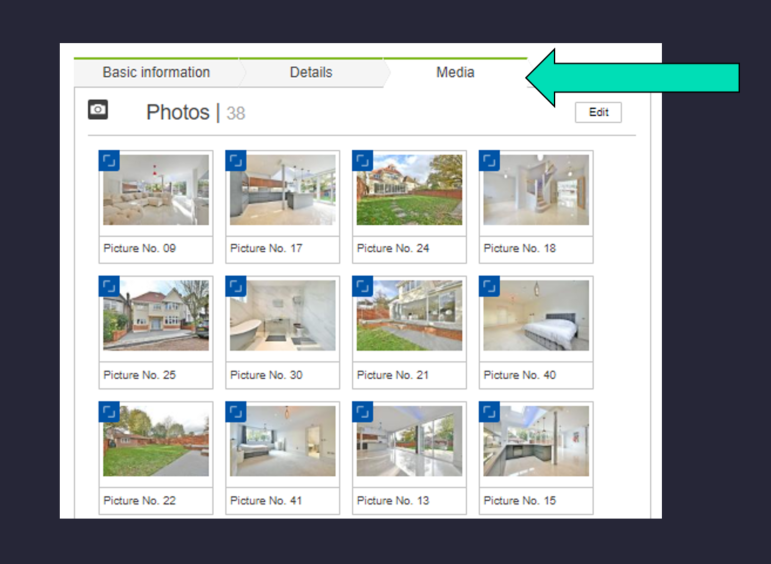
This is where you’ll see all of the property photography and helpful things such as floorplans and brochures.
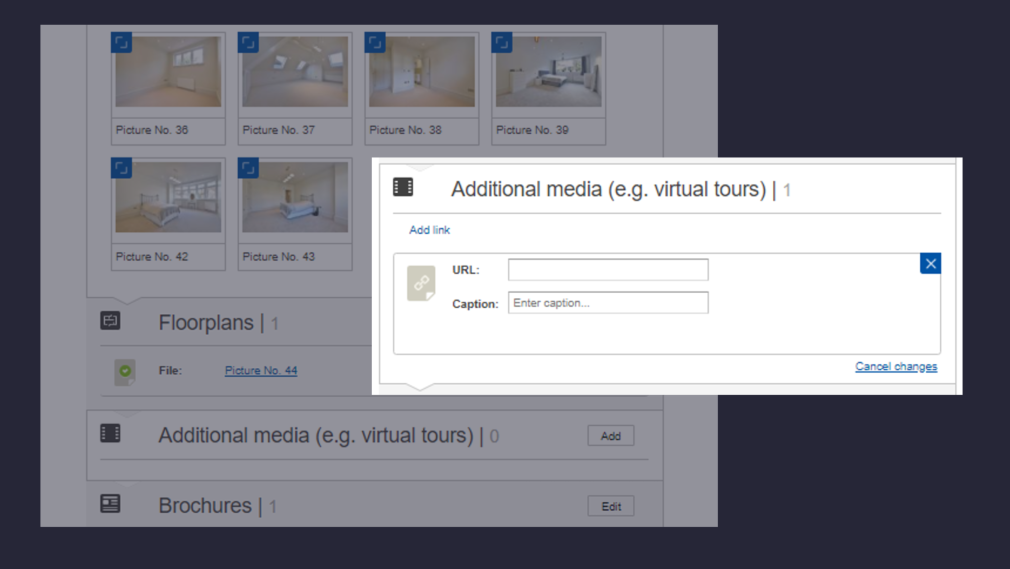
Look for the section called Additional media and click on Add
Please be aware: Your content will need to be hosted online.
If you use YouTube or Vimeo, the content will be embedded in the Property Details page and viewable within the property listing. You can also share an externally hosted secure link. For example, your software supplier may provide a URL or you may host Virtual Tours or video on your own website. In that case, the Virtual Tour or video will appear in a separate pop-up window.
Enter the URL of the Virtual Tour or video with a caption summarising the content and click on the Save button.
Keep private and personal information censored
Today’s technology can produce extremely high-resolution images, videos, and virtual tours. Under GDPR, when publishing property images, tours and videos online, you become the data controller, meaning you’re responsible for ensuring that no personal data, documents or sensitive information are shared publicly, so it’s worth taking the time to check with the vendor if any sensitive information is on show.
>And that’s it